Let it Colonize
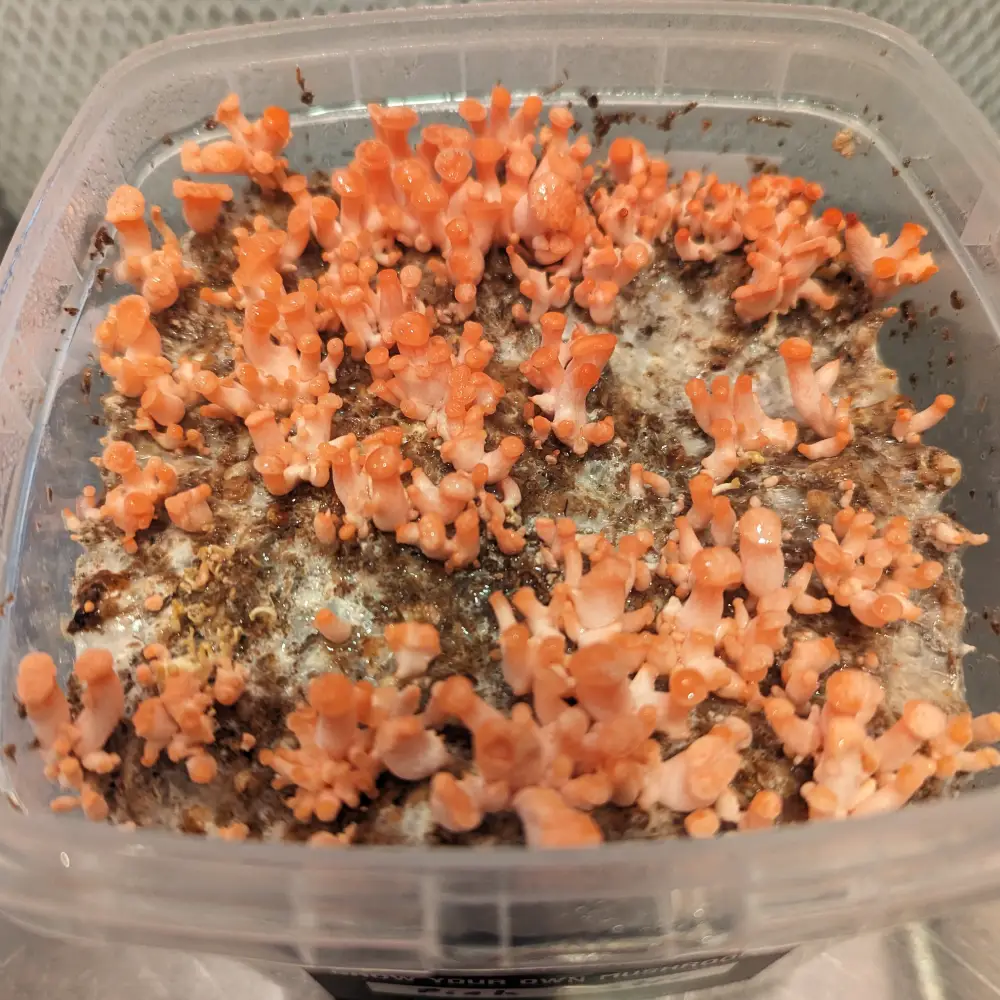
Don’t open the lid just yet! Let the substrate inside the container turn completely white as the mycelium weaves its way through. This can take 5-14 days depending on when you received your kit. 2-4 days after the substrate is completely colonized, small pins (baby mushrooms) will form on the surface.

Open it up
Once you see pins on the surface it’s time to remove the lid and set it aside for later. If you don’t see pins but the surface is white like this you can still remove the lid and it will induce pinning.

If yours doesn’t look just like this that’s ok! Just keep the surface moist and mushrooms will grow soon.

Oyster mushrooms require lots of fresh air to grow but they can also dry out quick. Your counter, desk, table or most anywhere indoors will work just fine. Usually the kitchen is pretty humid relative to the rest of a house. The important thing is to keep the surface hydrated.
Keep it moist
Spray the substrate 4-5x per day or more if needed. Enough to keep them moist without soaking. As the mushrooms grow keep them but more importantly the substrate moist (surface of the cake). Once you see pins they’ll double in size every day. Fun fact, mushrooms are 90% water.

Spray both the mushrooms and the substrate enough to keep them hydrated! This can depend on how dry the air is but a good rule of thumb is, if it looks dry then give it some water.

Time to harvest
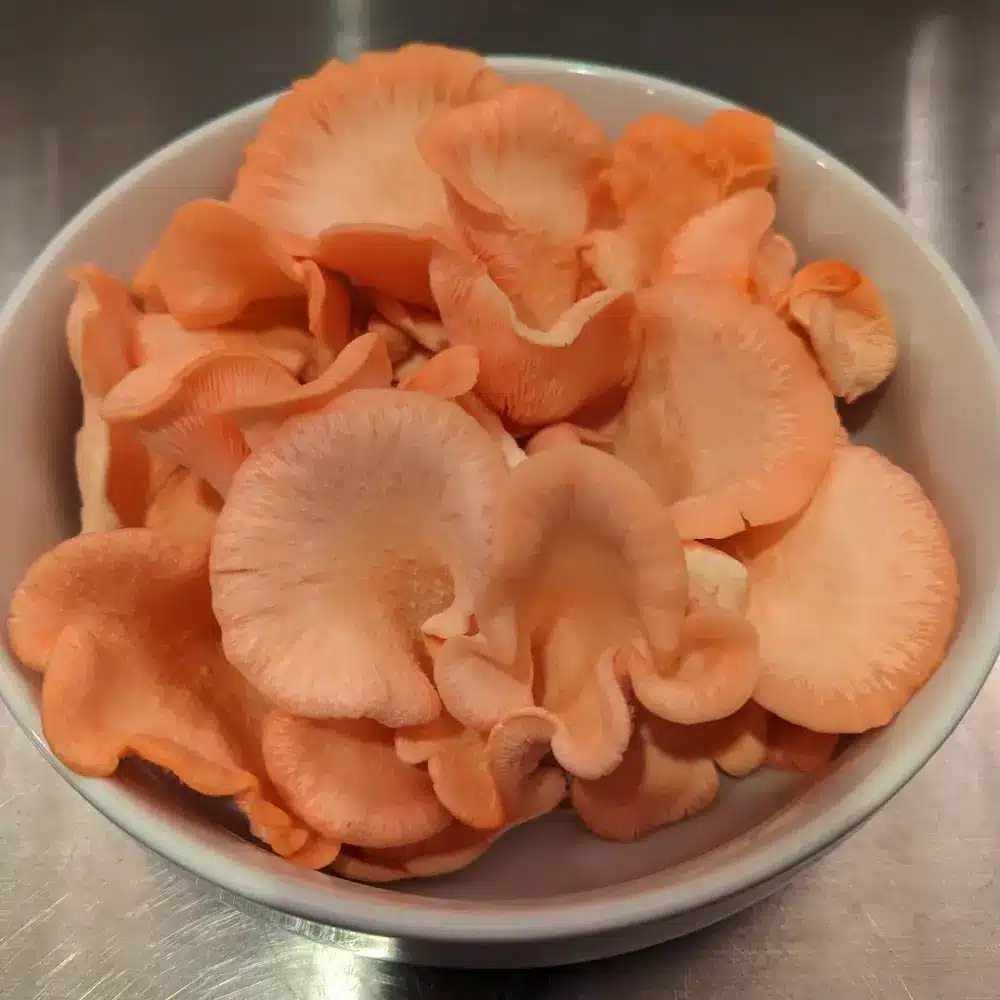
Mushrooms are ready to harvest when the cap begins to flatten out and they start losing color. If they mature longer they’ll begin dropping spores which you can see as a fine white dust on the surface below the kit. The presence of spores doesn’t mean they’re ruined, just that it’s for sure time to harvest.

Harvest the mushrooms by pulling the stems at the base. Trim off each cap where the gills meet the stipe or “stem” for maximum tenderness.
Let’s Eat
No need to rinse, just pop them into a pan to cook or refrigerate them in a paper or plastic bag. Each flush is a star ingredient in your favorite recipe or you can just sear them up with some butter and seasoning. Be sure to cook them thoroughly. I like them a little crispy. They last several days in the fridge but the reason you don’t see them in grocery stores is due to their shorter shelf life so be sure to cook them a few days after harvest.
Second Flush
Each harvest of mushrooms is called a flush. These kits will produce 2+ with the 2nd flush taking longer than the first. After the first flush it’s time to rehydrate the substrate. Fill up the container with water and put the lid back on. After 24 hours remove the lid and pour the water out. Spray the surface to hydrate then put the lid back on. In about a week you’ll see new pins, remove the lid and repeat the process.
3rd Flush
After 2 flushes the mushroom cake has spent a lot of its nutrients but it’s still got some left. You can pop it out of the container and shoot for a 3rd flush by misting the entire cake.
A customer named Amy submitted this idea so I call it Amy tek.

You can also bury it outside or just toss it in a compost pile or under a bush. If it’s not too cold and dry then more mushrooms will grow.